You will need some construction materials to build your skateboard kicker ramp and most of these items are available at stores like Lowe’s or Home Depot. For steel, you might have better luck going to a home improvement shop.
Here is our step-by-step guide on how to get it done the simplest and quickest way!
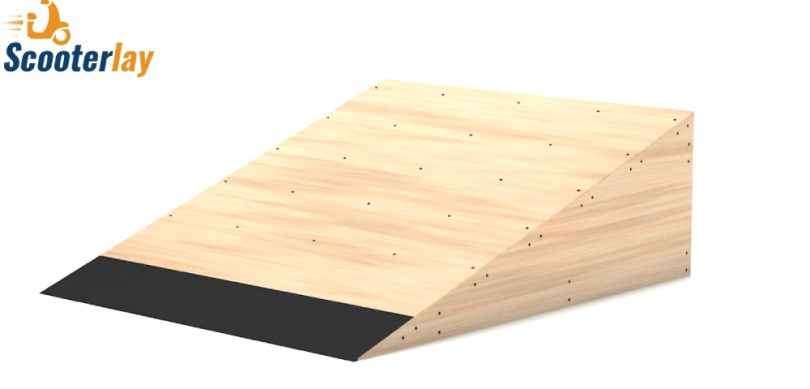
How To Build a Kicker Ramp
Step 1: Gather tools and equipment
Tools:
- 3/8 inch drill bit
- 3/16 inch drill bit
- Drill with a Phillips bit
- Circular saw
- Pencil and tape measure
Materials
- One 10 inch x 4 feet, piece of steel 3/16 inch
- 2 ½ inch pound box of screws
- 1 5/8 inch pound box of screws
- Five 8 foot long 2 x4 boards
- one ¼ inch masonite sheet 4×8
- two plywood sheets ¾ inch thick at 4×8
Step 2: Cut the boards and sides
Following the gathering of materials, you need to begin cutting. Cut each 2X4 board into two 3′ 10.5″ longboards out of the 8′ long ones. One of the plywood pieces should be cut down to 4′ by 6′ 2″.
There is no limit to how big or small a kicker ramp can be. If you are changing the size, make sure all the pieces are measured and cut to the correct sizing.
Step 3: Frame the bottom
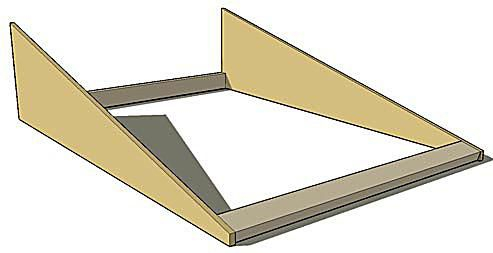
Now you need to screw in two of the 2×4 cross beams in.
Step 4: Frame the top
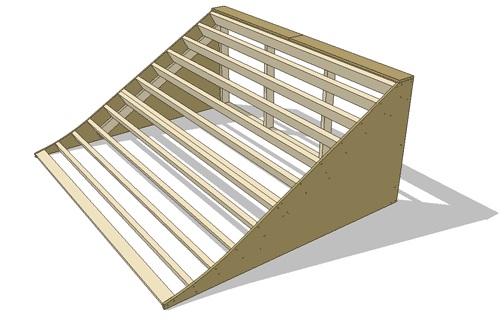
The remaining eight 2X4s should be attached along the top as shown. Begin at the bottom, measure 8 inches from the middle of the first to the middle of the second, and so on.
Make sure the 2X4s are flat along the top edge of the sides.
Step 5: Attach the plywood
Attach the remaining piece of plywood. The plywood’s bottom edge should barely touch the ground and work all the way up to the top edge.
Step 6: Fixing the masonite
Next, a sheet of Masonite is put on top of the plywood. The masonite should be 4 feet wide, 5’8″ long, 1/4″ thick. Attach it to the ramp’s top edge to extend the entire length.
Note that it does not go all the way down – that’s ok!
When screwing this sheet into place, make sure it is screwed into the plywood studs below, rather than into the plywood itself.
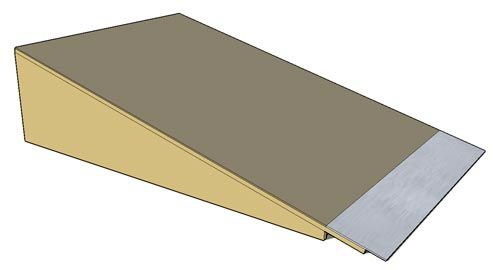
Step 7: Attach the steel
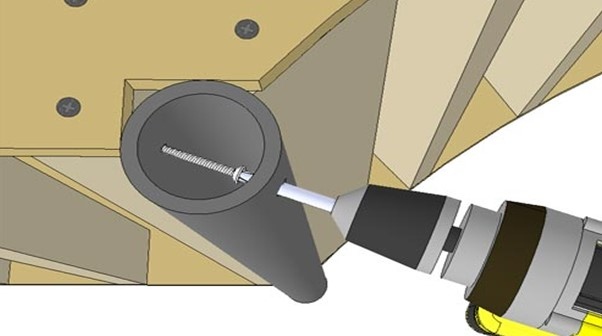
It’s tricky to attach the steel. Drill a 3/16″ hole in the middle, and 2 inches from either end. Once the holes have been drilled, countersink them with a 3/8″ drill bit to allow the screw heads to sit flush.”
Advantages of kicker ramp
- Portable and highly customizable
- Smaller and generally shorter
- Easily stored
- Legs on some can be collapsed
Problems with kicker ramps
- Water and dirt can fill up slots
- Cheap ones are prone to breaking
- The wood will split if it is not treated
- Rust can occur on steel parts
Caring tips for your kicker ramp
- Make sure no screws are sticking out of the ramp once you have built it
- The ramp can be attached to an old pair of wheels that makes it easier to move around
- It’s not a good idea to leave the kicker skateboard ramp out in the open, as the weather will begin to deteriorate before you even have a chance to use it
- Pressure-treated lumber is ideal for building the ramp. Although it will cost more, it will last longer. Do not breathe in the sawdust when you are cutting the wood – it contains harsh chemicals
- It’s paintable! Paint is more than just a pretty face – it’s protective too!
FAQs
1. What is the best kind of wood to use for a ramp?
Ans. Pressure-treated wood ramps are sturdy and durable when constructed and maintained properly, much like a deck.
2. What angle should a ramp be?
Ans. You’ll want a 45-degree angle with a low face, a gentle curve, and a low angle if you’re aiming for distance. A 60-degree angle, a tall face, and a tight curve when going for height
3. Can I make a ramp out of stairs?
Ans. Over the weekend, you can easily construct a ramp. Creating a sturdy and reliable ramp requires plywood sheets and wooden posts. Anchor the ramp with screws that are four inches long.
4. What’s the recommended length of a bike ramp?
Ans. There are 6?of ramp, 1?of height, the incline up to the curve is 4? long, and 2? of downhill slope. Balance bikers need a softer tail-end slope on the ramp.

Leave a Comment