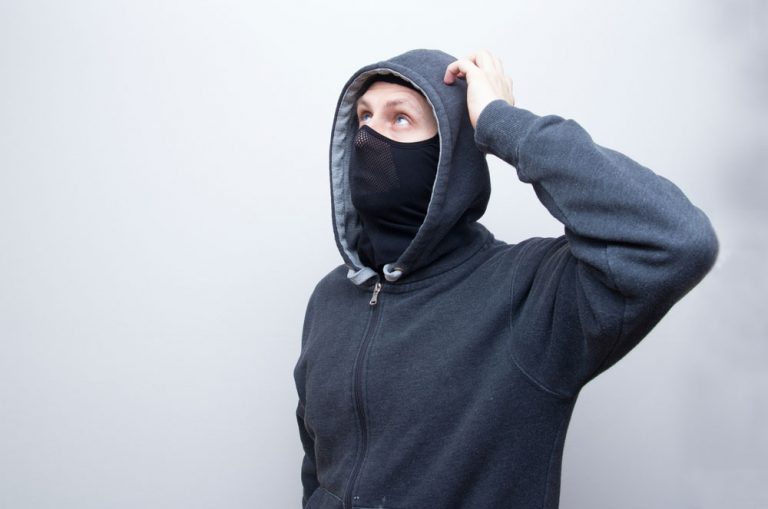
A balaclava or a free ski mask is a head-cover made from fabric that is used to shield the entire head from unfavorable weather conditions like wind, or cold. These are worn during skiing in the winter. The mask is designed to cover about 90% of the head with a small space that is meant for the eyes to see through. Ski masks are obtainable in stores that sales sporting materials; however, you can tailor one with a fashionable style to suit your taste. Just with the right proportion of length, and sewing machine, you can make a ski mask that is suitable and durable enough to protect you from the winter.
How to Make a Ski Mask? – Making the Pattern
- Measure out the width and length using a tape: Take the width measurement of the head. Now measure out the length starting from the top to down and to the front of the neck.
- Ski masks are designed in varying sizes. So it’s a matter of choice if you intend stopping blow the chin or you intend to pull it all over the neck. Take out the accurate measurement.
- Measure out the distance that exists between the eyes: Try to lengthen the measurement to the outer part of the eyebrow. It is essential to have a space that is wide enough, separating both eyes; this will allow a clearer vision.
- Take out the measurement from the upper part of the head to the eye top: This is important when cutting out the hole meant for the eyes.
- Add up an inch to the width and height measurements to create room for seams.
- Pen down the measurements: You will require all the dimensioned measured out as you proceed, so it is best to take note of each dimension.
- Use fleece ½ yard: from the mentioned size. You can get more a homemade balaclava; it gives you additional room for correction in cases where you have mistaken. Use a thickness that will serve best based on the climate. It is advisable to use thick fabric during colder climate.
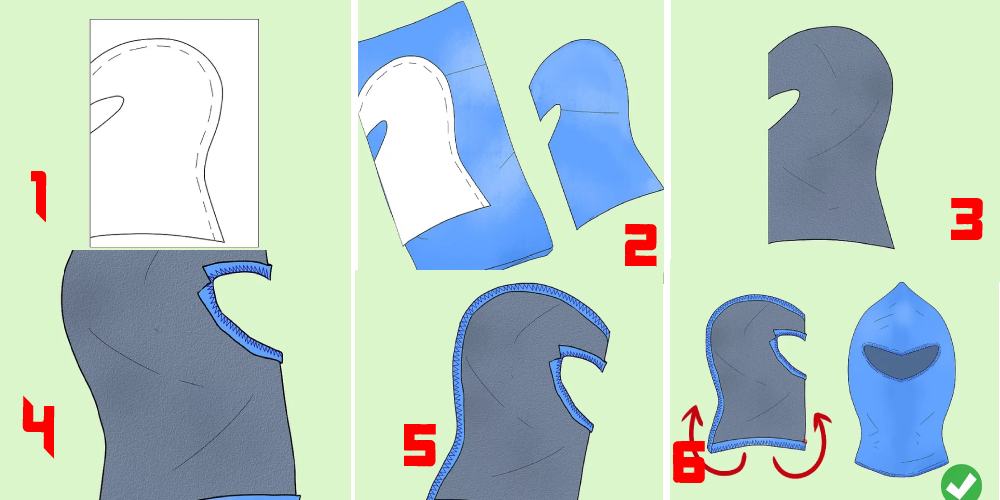
- Use a piece of paper to trace out the balaclava pattern. To do this effectively, it is important to have the shape of the balaclava measured and recorded.
- Mark out the line measured on the paper sheet and indicate the width and height. Now divide the total measurement of the width into two and mark out the horizontal part of the width.
- Mark out the measurement of the length that appears on the head top on the left side of the paper. Now divide the width located on the eye position into half now on the left side of the paper, try to separate the eye width into two equal half, and the measurement on the left side of the paper. You will need to cut out space where the eyes will see through.
- Trace out the pattern in line with the marks and each shape. Now link the marks using a domed top that will fit the head, with a curve at the back that will position your skull. Ensure you create enough space for your nose and mouth, to ease breathing and communication.
Sewing Your Ski Mask
- Make sure the fleeces are folded on the left vertical side. Stretch out the fabric horizontally to the folded edge. Make sure the fleece is the same size as your pattern.
- Position the pattern on the folded fleece. You can draw out a round pattern using a pin or fabric pen and cut it accordingly to the mapped out the shape using a fabric scissor. The only part of the fold on the left hand that will require a cutting will be the position where the eyes are located.
- Turn the outer part of the fleece and fold it again: Use a sewing machine and sew in the inner part of the fleece.
- Pinup the folded part of the fabric. Ensure you do this to the eyes and bottom part of the fleece before sewing it together. In both areas, map out ¾ inch double folded hem. Once you pin the position of the eyes, create a slanted cut at the right side of the corner then fold the sides downwards. Afterward, ensure it’s held to position using a pin.
- Make sure the sewing machine is ready with the right choice of thread you intend to use. Once you have your sewing machine ready and in place, use the zigzag stitch, be sure the stitches are small in size. The zigzag style provides the fleece with a durable stitch and allows it to stretch out properly than a straight stitch.
- Use the zigzag stitch to sew up the bottom. Sew up the eyes position using the zigzag stitching style. You can use a matching color or any suitable thread that blends with the color of the fleece.
You should wear a balaclava to ensure that you are safe from the wind and cold. If you can’t find a ski mask from a store around you, then it is high time to think of a DIY procedure in a suitable pattern that is good enough for you. Fabrics are generally affordable and easily accessible, so you have nothing to fear doing it yourself, since the entire process will have little or no influence on your budget.


Leave a Comment