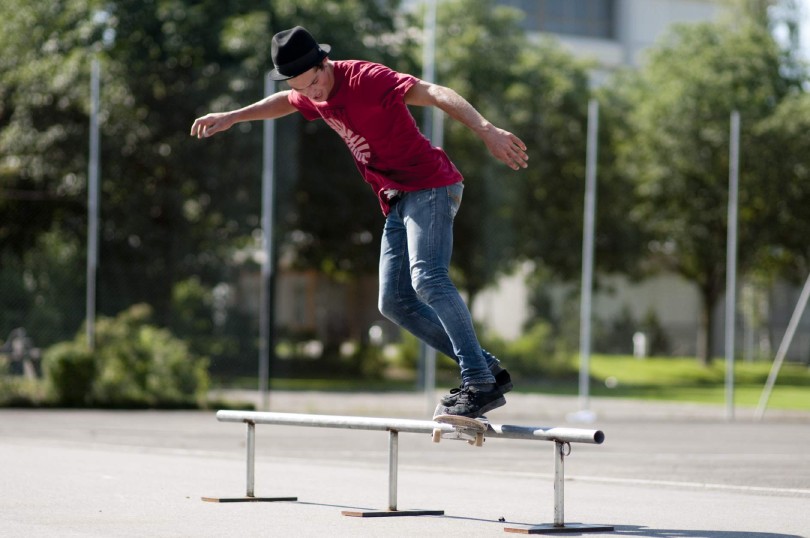
Skateboard power slides are the fastest and coolest way to stop. You can power slide by skating along and sliding to a stop by spinning your board to the side.
The ability to powerslide is not easy to learn, but it is a very useful skill.
With this guide, you’ll learn how to do –
- Frontside powerslide
- Backside powerslide
- Heelside slide
- Toeside slide
- Glove down slide
- Toeside pendulum slide
- Full 180-degree powerslide
- Speed checks
Why Try Skateboard Powersliding?
The powerslide gives you the ability to stop instantly with style for avoiding traffic and running into someone.
Skateboard power sliding adds flair to braking, slowing down, and transitioning. The best part is that it will give you the confidence to try out more advanced tricks!
How to Powerslide Skateboard: Things You Need
1. Your skateboard
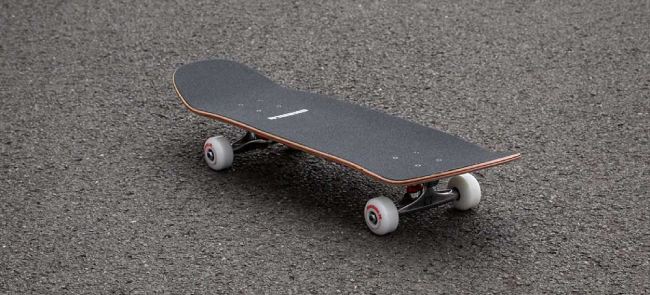
Learning to slide at a slower speed will also be easier with a flexible board; however, you will probably need a firmer board if you decide to slide at a faster speed in the future.
Slides require higher centers of gravity on decks like those with pintails and top mounts because they offer better traction than wheels. There is no need to carve deep to get into a slide.
2. Safety gear
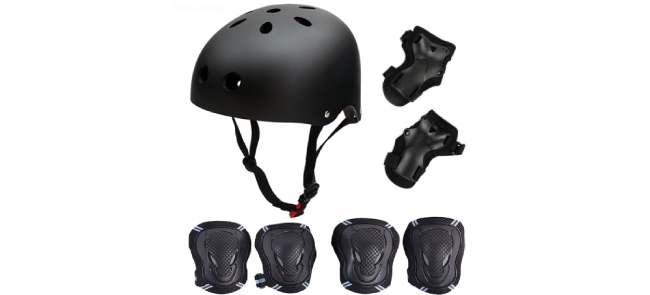
Safety equipment should be worn by every skateboarder. Included are helmets, wrist guards, knee pads, proper shoes, and elbow pads.
3. A plain wide open space
Powerslide at a level location with an approaching route that is slightly slanted. You can start about 10 feet up the hill then slide down. A powerslide is more likely to occur on the wet ground because your wheels are less likely to hold over wet surfaces.
Make sure there are no people, vehicles, or things you can crash into when you are learning.
How do you frontside powerslide?
Step 1: Gain speed
Before you start a frontside powerslide, get some momentum, as it is meant to slow you down and possibly bring you to a halt.
Step 2: Place your feet properly
Your front foot location needs to be on top of the skateboard bolts, and your rear foot location needs to be on the tail.
Step 3: Balance
Your board will be easier to control the wider your stance. Balance your weight evenly to maintain a balanced stance, and avoid hitting the nose of the board with your front foot too hard.
Step 4: Jump and shift
It’s easier to powerslide if you aren’t pressing all of your weight onto the board. Right before you slide, bend your knees and take a small jump on your board to reduce friction.
You can prepare to slide the back wheels to a sideways position by adjusting the position of your back foot after lifting up a little.
Step 5: Slide back
It can be difficult to maintain your balance if you suddenly slow down your board while riding.
In order to stop and transition using a powerslide, you must remain balanced as you return to the skating position; otherwise, you may fall to the ground.
How do you backside powerslide?
Step 1: Build momentum
Take your board somewhere like a hill so you can gain speed. Power sliding with momentum is slightly easier.
Step 2: Place your feet properly
The foot in front needs to be over the bolts of the board. the foot at the back needs to be on the tail. Kneel as if you were going to do a frontside powerslide.
Step 3: Push and twist
Maintain your balance by keeping your head above your board. The back foot needs to provide enough power to push the deck, and the front foot needs to provide
enough support for the pivot.
Now, twist the body forward so you can use the back foot force to glide the deck 90 degrees. So, you ride backwards for a few seconds.
Step 4: Relax
In order to transition from one trick to another without stopping, ease your back foot and relax the body a little to help move the board back to the normal riding stance.
How do you heelside slide?
Step 1
Your front knee should be bent, and your weight should be on it
Step 2
Set the heel of your back foot into the rail to kick out your back truck, extending your back leg
Step 3
Push and turn while swinging your hips at the same time
Step 4
When you lean back and lift your arms, the board will lose traction, helping you de-weight it
Step 5
Put both of your legs into the hill as you push your board away from you
How do you toeside slide?
Step 1: Get ready
Just like the Coleman Slide, you start off on the other side of the road.
Stay relaxed, bend your knees somewhat, and balance your weight on your board
Step 2: Setup carve
Make the slide on the side you want. The setup carve is crucial since it prepares your body to initiate the slide
Step 3: Spot your slide
As you cross, find a place to put your hand. Over your board’s nose, get low, and try to put your weight forward as much as possible! Take advantage of rails now.
Step 4: Plant your hand
Place your hand where you can see it as you cross. Lean over the nose of the board, bend down low and lean forward as far as you can handle. Take advantage of rails now.
Once you plant your hand on the ground with your weight forward, your back foot will come up to the tip of the toes.
Step 5: Initiate the slide
Once you plant your hand on the ground with your weight forward, your back foot will come up to the tip of the toes.
Breaking the grip on the back of the board requires two actions – trying to kick out and moving your free arm.
Step 6: Let it slide
Drag the slide-out until you get to where you want to slow down or for as long as you can handle.
Hold your body in a twisted position and continue starring at the road, or you risk over-rotating.
Step 7: Bring it back
Your free arm should be dropped, then you should spread out your body and pull the bak foot under you to allow you to hook back up.
Step 8: Roll away
Now bring your hand back up and complete.
How do you glove down slide?
Step 1: Breaking traction
At about a 45 degree angle, I start to break traction to prepare for the glove down blunt slide. The tail of your board will drag on the ground as you stay on top of it.
Step 2: Getting your tail to make contact with the ground
While you’re still at 45-degrees, you’ll want to keep your weight on your hand and remain on top of your deck to avoid washing out.
As you distribute your weight properly, lower the back leg you will now hear the wood scraping the ground.
Step 3: Holding the slide-out
Turning your body just a little bit beyond 90 degrees is helpful when bringing the board up to you in order to keep the tail pressure. By doing this, the slide will last longer.
Step 4: Getting back up
It takes three distinct steps to get out of the glove down blunt side to help you roll away steezy and straight.
- Feeling when you’ve reached the end of your slide
- Resuming your normal stance by shifting your body position
- Raising your tail and moving forward to get up
How to do a toeside pendulum slide?
Get accustomed to carving toeside
The key to learning how to do toeside slides is by practicing hard carves toeside while your hand is down. The process is known as hand drag carving.
Step 2: Foot positioning
Make nsure you have the right foot and body placement before attempting toesides.
Foot positioning is the first thing to consider. Your front foot should be in close proximity to the front truck at a 45-degree angle.
Your toes should at least be close to the toeside rail when you are ready to slide.
Step 3: Body positioning
Ground-level
When it comes to body positioning, you should be in a position similar to that below.
On the board
If you don’t want to grab your board, you can do this without grabbing it. Just like above, bend your legs a bit more and lean into your toes more too.
Step 4: Speed
Speed is needed to pull off the pendulum slides. Keep a faster pace than you would running. I also recommend learning it on hills, since pushing will not give you enough speed.
When you are already able to slow down with a push-up slide, you shouldn’t be afraid to go fast. If you get spooked or lose confidence, you have a way to slow down.
Step 5: Setup carve
Next, we’ll do the setup carving. When you reach this stage in the setup carving, you will be starting the slide setup. Get into the toesides position by crouching.
Step 6: The swing back
Let go of your back foot while keeping pressure on the front foot. By doing this, the board should straighten up and return to a normal 90-degree angle. The shoulders need to follow the same. You’ll need to bring your trailing shoulder in if you’re having trouble.
Guide the board forward, releasing your backfoot pressure when it is almost straight again.
Lastly, bend your knees to crouch down on the board once you have hooked up.
How to do speed checks?
It takes practice to master most sliding techniques, but stand-up slides and speed checks present a greater challenge than what the glove-down slides do.
With any form of sliding, speed checking is pushing your deck across the surface, so the wheels skid for a brief moment before returning to their normal riding stance.
Controlling your speed is crucial, such as when you’re riding a longboard downhill.
How to do a full 180-degree powerslide?
This is similar to a heel-side check, except you kick out more, causing your board to rotate 180 degrees. In order to throw the board effectively, you need to kick out with your back foot and throw the board forwards using the front foot.
Your back foot will kick out forwards, but your front foot will push back, and you should try to land firmly on the bolt as soon as the rotation is done.
To make this trick easier for you, try moving slowly on even flat ground and tossing your shoulders more.
Why You Should Be Aware of Flat-Wheels
While rolling over a flat spot on a wheel, the wheel makes a zipping sound. Your board vibrates as a result. It’s time to replace your skateboard wheels if they’ve worn out or if they’re cheap.
If you roll while you have a pebble under your wheel, causing the wheel to become stuck. As a result, you fall.
Pro tips and common mistakes
- Try not to tilt
- Walk before you run
- Venture outside comfort zone
- Not thoroughly prepared
- Overexercising
- Watch tutorial videos for inspiration
- Avoid mongo style
- Learn to ride fakie
- Learn from your peers
- Train your core
- Improve your style

Leave a Comment