A skateboard is a shaped wood in the form of a surfboard, with four sets of wheels attached underneath. The board permits one person at a time, and movement is controlled with the use of feet. It can be used as a medium of transport within a short distance and on some occasions, for stunting activities. Irrespective of the function, all types of skateboards are designed with similar features.
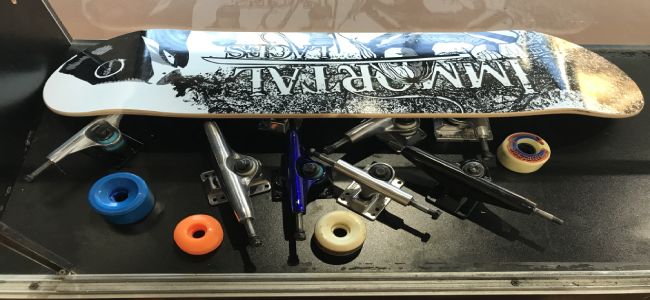
Before showing the process of making skateboard decks, you need to know the skateboard has its part segmented into three – the real board which is also known as the deck, the wheels, and the truck.
Normally, its size ranges from 81.3 cm in length to 20.3cm in width. Most times the board is designed with a thickness that is less than 1.3cm. The deck has a nose and a tail that is held together by the center of the board.
Making Skateboard Decks: What to Do & How
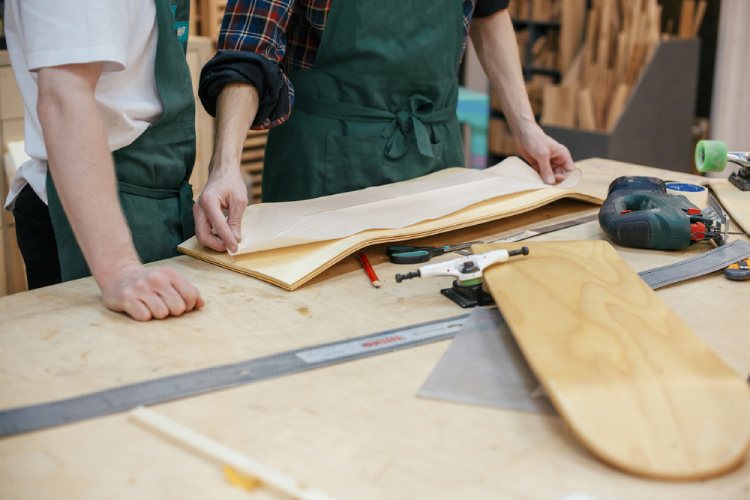
Skateboard Veneer
The veneer of a skateboard can be divided into three groups – the unsanded or sanded core ply, face ply, and cross band ply. These plies are usually unsanded. The manner at which you position all the layers will affect the weight, strength, and texture of the board.
Below is a way to which the plies can be arranged
- Face
- Core layer
- Crossband
- Core layer
- Crossband
- Core layer
Though this is subject to the result you have at hand, veneers are always available in the order of thickness above.
Skateboard Glue
You can use glue of high quality that is made for woodwork or glues that are specifically manufactured for skateboard. You can use a paint roller to apply the glue all over the desired surface. As a matter of fact, a paint roller will be suitable enough to access all edges and corners. Use a roller with a small nap that has a width of fewer than 4 inches. Most times the amount of glue needed on a particular surface can vary depending on the nature of the glue been used. We recommend using three ounces on each veneer if you have a dry roller and two ounces on each veneer if the roller is glue-wet. You have to ensure that the coat is evenly distributed and that none of the spots is having a dried glue.
One of the major challenges you will encounter when constructing a skateboard is; delamination, and this is caused due to lack of glue. So it’s important to do the entire process fast and ensure the glue applied is enough on the surface of the veneer.
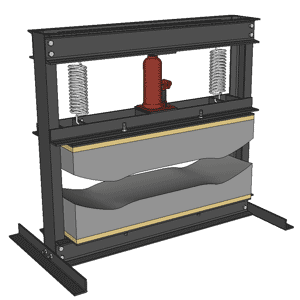
Skateboard Molds
Next, you will need to place the veneer in a mold. The mold is responsible for creating the desired shape. There are different varieties of mold, from wood, foam, concrete, and aluminum.
Choosing the right mold goes a long way. The mold is used to determine the nature of the press to be used, the number of decks you intend to make, the equivalent space needed and your current budget plan.
There are a lot of factors to consider when choosing the right mold. Factors like the type of press you are going to use, how many decks do you want to make, how much space do you have, and how much is your budget.
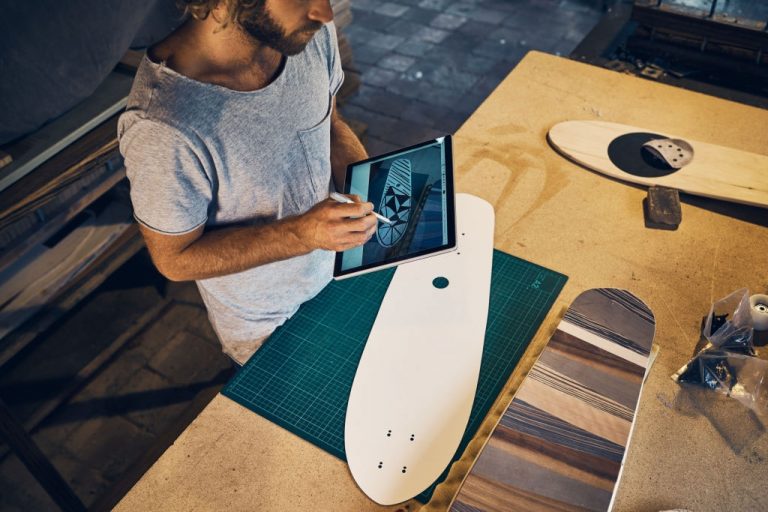
Drilling the Holes
You will need a drill press to drill holes on the deck. The use of a standard drill is recommended, but you have to ensure all holes drilled are perpendicularly positioned on the surface of the deck.
To locate each hole, you will need to use an old deck as a template or take accurate measurements to locate the center of the deck, and know the wheelbase, then proceed further.
Skateboard Press
The range of machine press is solely determined by the size of the mold. Irrespective of the type of mold used, cool pressing the veneer can be important and this can be done at room temperature. Although there are a lot of factors that will help determine the amount of pressure needed but 175 psi or 25 tons is suitable to get started.
If distributed properly; there are brands of adhesives that can last for 15 – 20 minutes. If the glue you are using is made specifically for skateboard, like PC-2365, correct tonnage and Multi-bond you should be able to remove the deck within 1 – 2 hours.
If your glue is less than the expected tonnage. For instance, if you are using a 5-ton press; you will have to leave the veneer within the skateboard press for a protracted period. Maybe for 24 hours.
When the board is removed from the mold, allow it for another 24 hours before carrying out any additional work on the board. Doing this will help the wood and glue to be dried completely.
Rounding and Sanding the Skateboard
The use of sanding or router is the major way to clear the rounded edges on your deck. You can do this using a mini or palm router –since operating it is less burdensome and you can maneuver little spaces easily. The size of the radius used is dependent on personal preference.
Once the edges of your deck are smooth and shaped properly, the next phase is to sand the surface of the deck. You can do this with 80 to 100 grit sandpaper and move progressively to 200 to 210 grit sandpaper. At this point, you have a deck that is super-smooth!
Shaping the Skateboard
To get the right shape, you will need a deck that serves as a template. Trace out the deck which serves as your template on the blank you intend to use, now use a jig or band saw to saw it out following the shape of your template.
Sealing the Skateboard
Once your deck is smooth enough, remove the sawdust on the deck surface using a tack cloth. Your tack cloth can be a cheesecloth with wax coating on it. Once you have a deck that is smooth and free from debris, the next phase is to seal up the deck surface.
Graphics
When you are done sealing the surface, then you can proceed to the “Graphic Phase.” You can use spray paint, stencil, screen print or freehand, it all depends on what you want all you need is a paint that has the same or similar appearance with your final coat and sealer. If you used a solvent-based sealer, you will need to use a solvent-based paint. If the sealer happens to be water-based, you will need to use water-based paint.
Final Coat
When you are done with graphic the next phase, is air-dry the board, use a tack cloth and clean off the deck of the board.

You can use a lacquer sealer to cover the deck, though this depends on the nature of the product you are using.
FAQs
What kind of wood is used for skateboard decks?
About 75% of the deck is made from maple wood obtained from North America. The wood is very stable and durable. Conventionally most skateboards have maple wood layers arranged with an adhesive glue or an epoxy resin.
How much does it cost to make a skateboard deck?
Normally the summed price of a skateboard will range from $160 – $170. The trucks and the deck are the most expensive parts of the skateboard. If you want a less expensive setup, you should budget a minimum of $64 if you intend to build a board from scratch. Choose a skateboard deck wisely so you can get optimal performance from the board.
How long should a skateboard last?
If you are addicted to skating a consistent replacement of the deck will be needed. You might need to change IT within the range of 2-3 months, it all depends on the quality and brand of deck you use.
Taking a step to make a skateboard is not difficult if you adhere to the right instruction and use the right material and tools needed for the task. If you adhere to the steps then the entire process will be fun. Once your board is ready, you can start the learning process, but ensure you have all your necessary gears on.

Leave a Comment