
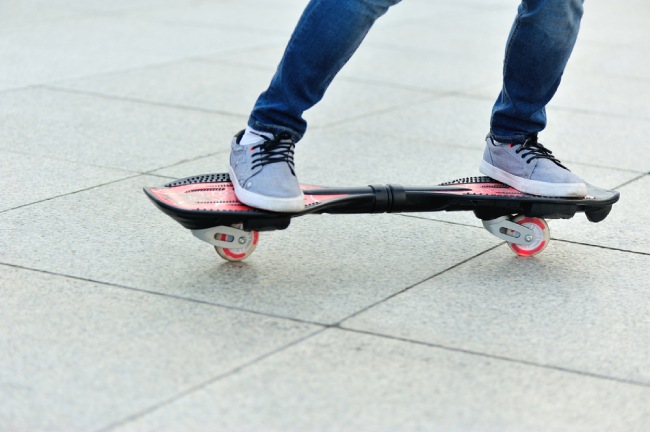
RipStick is a type of caster board that is similar to the conventional skateboard. The caster board has two ends similar to the skateboard, but this time both ends have two movable wheels. Movement is brought about on the RipStick by twisting the body to a given direction you want to move.
The technique applied here is pretty similar to that of a skateboard, but this time there are many stylish procedures you can adhere to perform a variety of styles of while in motion. In this article, we will be looking out for tricks on RipSticks that are possible while in motion. These are:
How To Do Tricks On Ripsticks
1. Flip Start
This is just a cool way to start riding. It is quite easy to learn even for absolute beginners. The flip start is an attractive step to start with, especially for beginners. The trick is simple, easy to perform and quite awesome to behold.
One of the major significance to start with the flip start is that boost your level of confidence and at large boosts your performance. If you can carry out this step effectively, then all you will need is a little step to get going in the right direction. It will help you while carrying complex techniques on the RipStick.
2. Flip and Turn Start
The seconds the flip starts with a bit of difference. Though you will need to be a little bit stylish while flipping and jumping on the board. This time, you will need to perform 180° turn while you’re still in the air.
3. High Caveman
The high caveman is an easy stunt for beginners too, it is similar to the flip start. It requires holding the board and traveling with it before jumping on to kick start a ride. For this to be done successfully, both feet should be in the air to match perfectly on the surface of the RipStick before it gets to the ground.
The stunt is an easy step to quick start your board. You will need to hold the board and jump on it to get moving.
4. Manual RipStick Tricks
The manual stunt is divided into two, these are nose manual and rear manual. To carry out the rear manual trick –you push yourself and at the same time move your slide. While doing this, try to focus your weight on a particular position. Doing this will raise the front end of the board. Try to avoid much weight on the back of the board to avoid falling due to drag on the rear end.
5. The Nose Manual
The nose manual serves as an alternative to moving backward and centering your entire weight on the back of the RipStick, all you will need to do this time is move a bit forward and center your weight there.
One of the most essential aspects of this trick is that you need to be alert whenever the weight you are applying is too much. It is important to gain balance in the right position.
6. Going Up & Down A Curb
There are those with the opinion that this technique is not a trick. But we decided to write about it because it is usually difficult when compared to some of the listed tricks. This is carried out with the combination of the front manual and wheelie.
7. Hang 10
This trick is one of the most popular tricks on RipSticks. But to carry this out effectively, you will need to speed up the RipStick, and it can be done practically by anyone. All you will need to do is take your foot close enough to the front end of the board while speeding up. Avoid placing your foot on the edge of the RipStick, doing this will cause the rear end of the board to rise.
While you have your foot in front of the wheel, now to move your rear foot with it. Once it’s done, you will have both of your feet position rightly at the end of the board. Regulate your weight to control the other end of the board from rising. While doing this, open both of your arms to get the maximum balance that can carry you through the entire process, do this and hang on it. In summary, as the rider, you are required to move both of your feet to the front part of the board deck.
8. Hang 20
From the way both names sounds, you can quickly guess it is similar to hang 10. This time you will need to move both your feet to the rear part of the RipStick. Many are of the opinion that the step is pretty easy when compared to hang 10. Everyone has their opinion and there are always those cautions, you can give that a shot and see for yourself.
9. 360° Wheelie
This trick is not for beginners due to the logic required when carrying out the stunt. While in motion in a given direction, you will be required to add a bit of force at the rear end of the board to create the 360° stunt.
You will need to focus and proceed in a specific direction before performing the trick. Although the steps involved can be difficult but with constant practice, you can scale through with time.
10. Body Varial
The stunt is similar to 360° Wheelie, but with time you will be required to take a leap off the board and make 180° turn in place of the usual 360-degree turn. The rider should be the only one who makes a jump around the skateboard. What makes these skills amazing is; the movement of the board along the direction it was before the stunts are performed. The entire process is complex and so beginners are not advised to try it.
11. Ollie
While performing this stunt, you and the board will have to lift into the air at the same time and this done without the use of hands. Try to position your weight directly at the back of the board and let go of it while jumping.
Precautions to Take
Riding on a RipStick can be very dangerous. Since the activity involves motion, accident in some situation is possible. So to stay safe, it is always important to adhere to the following.
- Always use protective gear like SNELL, ANSI, CPSC, ASTM kneepads that are approved. Use skating helmets, gloves, long sleeve shirts, long pants, and shoes. Avoid the use of sandals and barefoot while riding.
- Do not ride along water, sand, speed bumps or any form of obstacle that limit the movement of the wheel.
- Make sure you’re below 220 pounds.
- Avoid underage children from getting close to the board. If they must, they should be under the supervision of an adult.
It’s easy to think that riding a RipStick is difficult because of the presence of two wheels, but it’s not. If you have background knowledge on how to maneuver a skateboard then this will also be a simple step to take, all you need to do is stick close to the safety precaution involved and stay away from complex stunts until you have developed enough confidence to give it a try. Enjoy!
FAQs
Q. How do you do a RipStick uphill?
A. Pull the RipStick by forcing it against the board side using your left foot. Now position the left foot on from part of the RipStick. Lean your body a bit forward on it while raising the right foot from the ground. Lower the right shoe on the rear part of the board.
Q. Who invented the RipStick?
A. Carlton Calvin who is the leader of the company in 2006 introduced the use of RipStick in America.
Q. How do you stop a RipStick?
A. Ensure you are on a flat surface and try to slow down the board a bit above walking pace. You can do this by allowing the board to ride freely without making any form of twist for speed. If you want to stop; make a turn, step off from the board and take two to three steps to break down your speed. Since the board can’t maintain a balance, rolling off will not be possible.

Leave a Comment